Embossing for packaging uses matched dies and pressure to raise selected areas of paper or paperboard. It creates visible depth and a tactile surface without necessarily adding ink, foil or coating.
Common options include blind embossing, registered embossing, single-level embossing, multi-level embossing, sculpted embossing, microembossing and foil embossing.
Choose embossing when a logo, product name, pattern or illustration should be felt as well as seen. The best result depends on the artwork, paper, board thickness, embossing depth, printed registration, package structure and production quantity.
Packaging Embossing at a Glance
| Embossing Type | Main Effect | Main Benefit | Best Suited To | Relative Cost |
|---|---|---|---|---|
| Blind embossing | Raised design without ink or foil | Creates subtle material-based branding | Uncoated paper, premium cartons and rigid boxes | $$ |
| Registered embossing | Raised effect aligned with printing | Adds depth to printed logos and illustrations | Cosmetics, perfume and retail packaging | $$–$$$ |
| Single-level embossing | One consistent raised height | Produces clean, defined logos and text | Brand marks, borders and simple patterns | $$ |
| Multi-level embossing | Several distinct embossing heights | Creates more complex dimensional detail | Crests, illustrations and luxury packaging | $$$ |
| Sculpted embossing | Curved and contoured three-dimensional relief | Creates realistic depth and artistic detail | Premium logos, emblems and collector packaging | $$$ |
| Microembossing | Very fine repeating surface detail | Adds subtle texture and light reflection | Foil, labels and decorative patterns | $$–$$$ |
| Foil embossing | Metallic foil combined with raised relief | Adds reflection and tactile depth | Luxury gift boxes, wine, perfume and cosmetics | $$$ |
| Braille embossing | Standardized raised dots | Provides accessible product information | Pharmaceutical and regulated packaging | $$–$$$ |
Relative cost is a general comparison only. Actual pricing depends on die construction, embossing area, number of levels, substrate, registration accuracy, order quantity and whether foil stamping is included.
What Is Packaging Embossing?
Embossing physically reshapes paper or paperboard to create a raised design.
A typical system uses:
A male die containing the raised design
A female counterdie containing the corresponding recessed shape
Pressure to form the material between the two tools
Accurate sheet positioning to align the embossing with printed artwork where required
When the sheet is pressed between the dies, its fibers deform and retain the shape of the tool.
Unlike printing, embossing does not need to add color. Unlike raised UV coating, the height is formed by reshaping the packaging material rather than depositing a thick coating on top.
Embossing is commonly used on:
Folding cartons
Rigid box wrapping paper
Cosmetic boxes
Perfume packaging
Skincare packaging
Jewelry boxes
Wine and spirits packaging
Chocolate and confectionery boxes
Shopping bags
Presentation folders
Book-style packaging
Product-launch kits
Hang tags
Pharmaceutical cartons
Modern flatbed die-cutting and embossing equipment can combine cutting, creasing and embossing with accurate sheet registration. Heidelberg identifies cosmetics and food packaging among applications requiring precise embossing and converting.
How Does Packaging Embossing Work?
A typical embossing process follows these stages:
The embossing artwork is prepared as a separate vector layer.
Male and female embossing dies are produced.
Printed, laminated or unprinted sheets are positioned in the machine.
Each sheet is pressed between the matched tools.
Pressure forms the material into the required relief.
The embossed sheets are inspected for depth, alignment and cracking.
The sheets continue to die cutting, folding, gluing or rigid-box assembly.
The exact process order depends on the packaging structure.
For folding cartons, embossing may be performed during or close to the die-cutting stage. For rigid boxes, the decorative wrapping paper is often embossed before it is mounted to the greyboard structure.
Embossing pressure, depth and die clearance must be adjusted to the paper and board. A setting that works on thick uncoated paper may tear a thinner coated sheet or produce insufficient depth on another material.
1. Blind Embossing
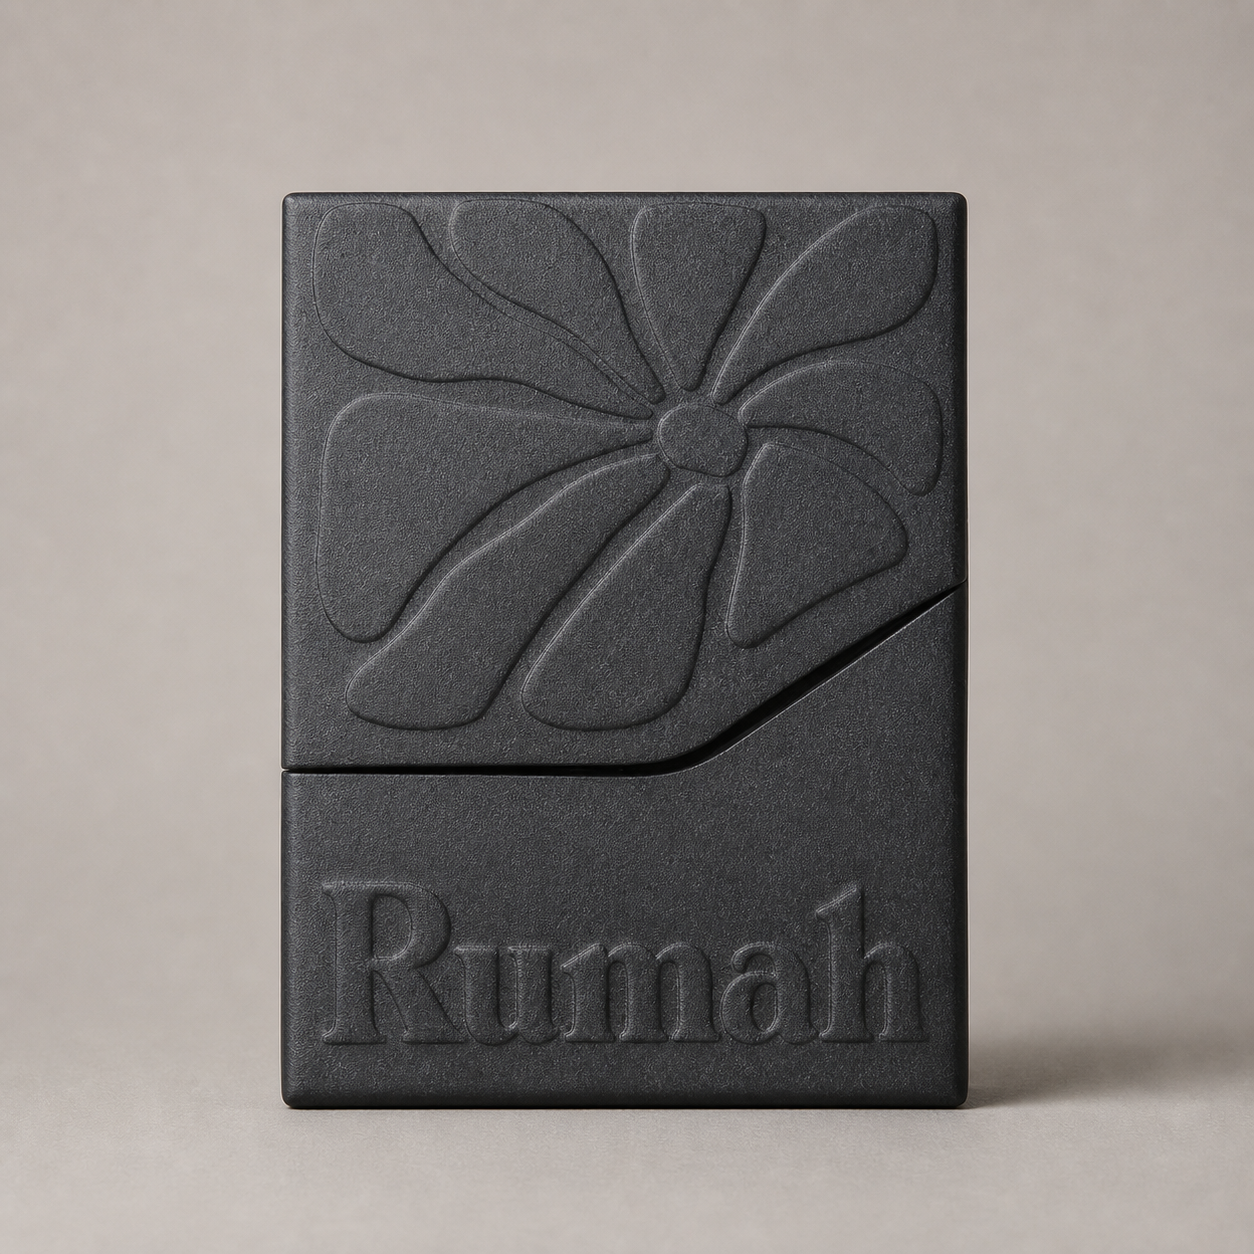
Blind embossing raises an area without adding ink, foil or another contrasting color.
The effect depends entirely on:
The shape of the relief
Paper texture
Light and shadow
Viewing angle
Embossing depth
Blind embossing is particularly effective on:
White uncoated paper
Black or dark specialty paper
Kraft paper
Textured wrapping paper
Minimalist premium packaging
Luxury stationery
Rigid box covers
It creates an understated effect because the logo or pattern remains the same color as the surrounding material.
Advantages of blind embossing
No additional ink or foil is required
Preserves the natural appearance of the paper
Creates tactile brand recognition
Works well with minimalist designs
Can be used on light or dark paper
Adds perceived value without metallic decoration
Limitations
The effect may be subtle under flat lighting
Very shallow embossing can be difficult to see
Deep embossing can crack or tear unsuitable paper
The reverse-side impression may remain visible
Large areas can distort or warp the sheet
Blind embossing should be judged using a physical sample because digital renderings cannot accurately represent shadow, depth or feel.
2. Registered Embossing
Registered embossing aligns the raised effect with printed artwork.
For example, embossing may follow:
A printed logo
Individual letters
A product illustration
Flower petals
Geometric lines
Decorative borders
Selected elements within a photograph
Registered embossing requires more production control than blind embossing because the printed image and embossed relief must align.
Important registration considerations
Printed artwork and embossing files must share the same reference position.
Sheet movement and printing tolerance must be considered.
Very thin outlines can reveal slight registration differences.
The embossed area may need to extend slightly beyond or remain inside the printed area.
Die cutting, foil stamping and embossing must use compatible registration references.
For detailed registered embossing, simplify unnecessarily thin outlines before tooling. A visually complex logo may look less precise if every small detail is forced into the embossing die.
3. Single-Level Embossing
Single-level embossing raises the complete design to one consistent height.
It is the most common choice for:
Logos
Brand names
Product names
Simple borders
Monograms
Large lettering
Repeating geometric patterns
Advantages
Cleaner and simpler tooling
More predictable production
Lower tooling cost than multi-level or sculpted embossing
Suitable for many common paper stocks
Good definition for straightforward branding
Single-level embossing is usually the best starting point when the primary objective is to make a logo clearly tactile without creating a complex three-dimensional illustration.
4. Multi-Level Embossing
Multi-level embossing uses two or more distinct heights within the same design.
For example:
The outer border may be raised slightly.
The logo symbol may be raised higher.
Selected internal details may remain at an intermediate level.
This creates more dimensional complexity than single-level embossing.
Multi-level embossing works well for:
Crests
Emblems
Luxury monograms
Architectural patterns
Layered illustrations
Decorative seals
Collector packaging
Limitations
More complex die production
Higher tooling cost
Greater pressure-control requirements
Increased risk of cracking on unsuitable material
More difficult registration with printed or foil elements
Longer sampling and approval process
The artwork should clearly identify each height. A supplier may request separate layers, colors or numbered levels to describe the required relief.
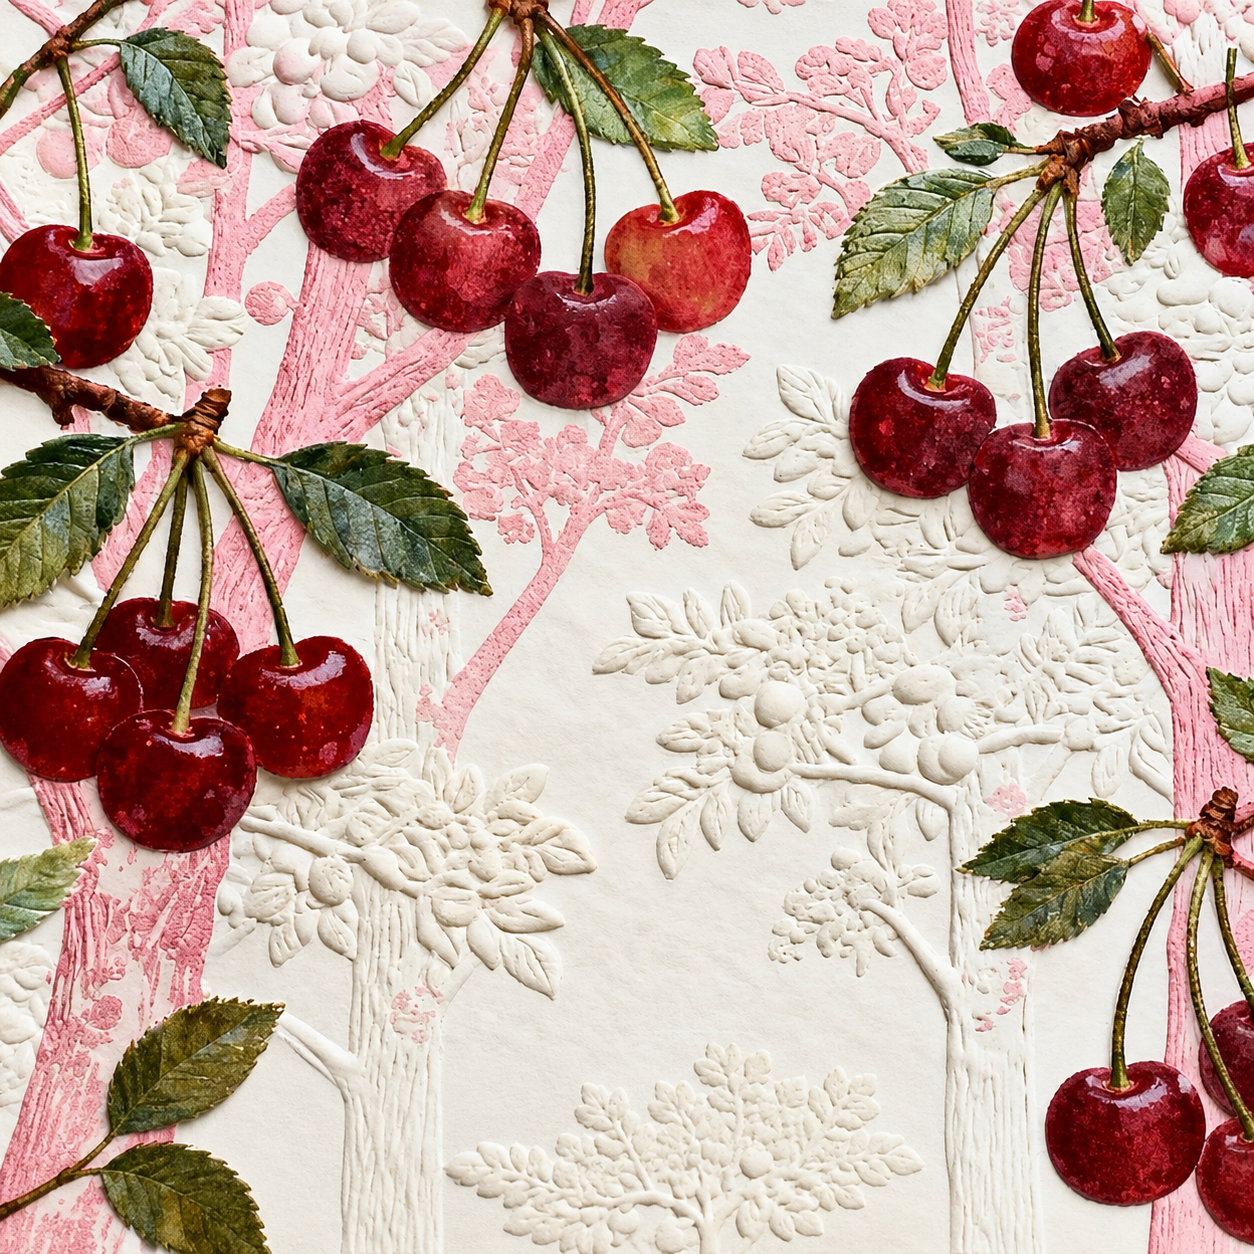
5. Sculpted Embossing
Sculpted embossing creates smoothly curved, rounded or contoured depth instead of using only separate flat levels.
The embossing tool is engraved or formed to reproduce gradual transitions.
Sculpted embossing can create:
Rounded lettering
Three-dimensional crests
Faces or figures
Leaves and flowers
Animal motifs
Medallions
Realistic product illustrations
Decorative architectural forms
This process is best suited to designs where shape matters more than simple elevation.
Sculpted dies require specialized tooling expertise. KURZ notes that intricate embossing depends on high-quality stamping tools capable of shaping paper carefully and reproducing detailed relief.
Because the relief contains curved transitions, artwork alone may not fully communicate the desired result. A three-dimensional reference, shaded rendering or approved physical sample can help define the intended form.

6. Microembossing
Microembossing creates very small, closely spaced surface structures.
Instead of raising one large logo, it may create:
Fine lines
Repeating dots
Geometric grids
Brushed-metal patterns
Optical textures
Security details
Light-diffraction effects
Microembossing may be applied directly to paper or combined with foil stamping.
It is commonly used for:
Premium labels
Cosmetics packaging
Wine and spirits labels
Security packaging
Limited editions
Holographic or metallic decoration
Small repeating background patterns
Microembossing should not be confused with ordinary printed texture. The pattern is physically formed in the surface and changes how light reflects from it.
The effect can be subtle, so it should be evaluated under different lighting angles.

7. Foil Embossing
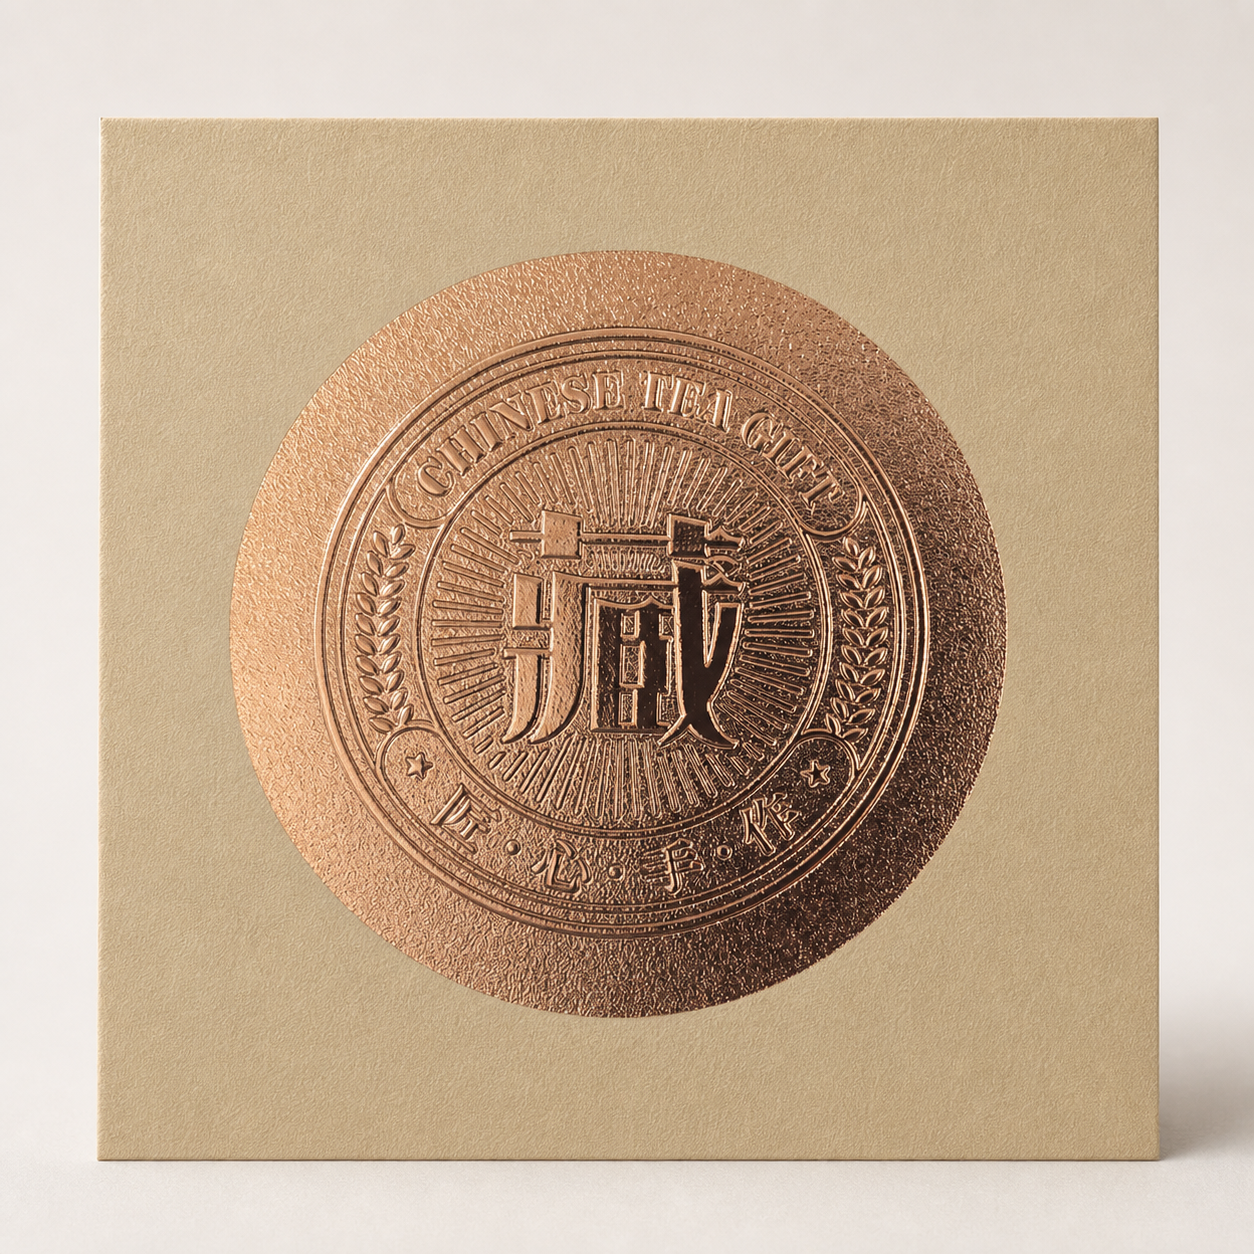
Foil embossing combines a transferred foil layer with a raised or recessed relief.
The two processes may be completed:
Simultaneously with a combination die
In separate foil-stamping and embossing operations
By stamping foil first and embossing afterward
Using registered dies for complex relief
Foil embossing is commonly used for:
Gold logos
Silver product names
Brand emblems
Wine labels
Perfume boxes
Cosmetics packaging
Luxury chocolate boxes
Premium gift packaging
Collector and limited-edition boxes
Advantages
Combines metallic reflection and tactile depth
Creates strong shelf impact
Makes logos easier to see under varied lighting
Supports premium brand positioning
Can produce sculpted metallic effects
Limitations
Higher tooling cost
More complex registration
Greater risk of foil cracking if the relief is too deep
Fine details may be difficult to reproduce
The substrate and foil must tolerate forming pressure
Sampling normally requires production-grade tooling
Learn more about metallic, pigment, holographic, hot and cold foils in our foil stamping for packaging guide.
Embossing vs Debossing
Embossing raises the design above the main surface. Debossing presses the design below the main surface.
| Comparison | Embossing | Debossing |
|---|---|---|
| Direction | Raised above the surface | Pressed into the surface |
| Main visual effect | Light catches the raised edges | Shadow forms inside the recessed area |
| Main tactile effect | Design can be felt above the paper | Design feels carved into the paper |
| Best for | Logos, lettering and decorative relief | Minimalist logos and recessed details |
| Reverse-side effect | May show a recessed impression | May show a raised impression |
| Foil combination | Can be combined with foil | Can also be combined with foil |
| Tooling | Male and female dies | Male and female dies |
| Design impression | More prominent and dimensional | More restrained and engraved-looking |
Choose embossing when the design should project outward and attract touch. Choose debossing when a quieter, pressed or engraved appearance is preferred.
For a detailed look at recessed impressions, materials and design considerations, see our debossing guide.
Embossing vs Raised UV
Both processes can create tactile branding, but they build depth differently.
| Comparison | Embossing | Raised UV |
|---|---|---|
| How depth is created | Paper or board is physically reshaped | Thick coating is deposited on the surface |
| Main material effect | Uses the packaging material itself | Adds a clear or colored coating |
| Appearance | Paper-colored, printed or foil-covered relief | Usually glossy and coating-based |
| Reverse-side effect | Often visible | Usually none |
| Surface feel | Formed paper relief | Smooth, rounded or textured coating |
| Tooling | Matched embossing dies | Screen, plate or digital application setup |
| Best for | Sculpted paper-based depth | Glossy raised logos and water-drop effects |
| Fold sensitivity | Deep relief can weaken nearby folds | Thick coating can crack across folds |
A blind embossed logo is embossing but not raised UV. A glossy rounded logo sitting on top of matte lamination is raised UV but not embossing.
Choose embossing when the material itself should form the relief. Choose raised UV when a glossy surface deposit is preferred or when the reverse side must remain flat.
Embossing vs Foil Stamping
Foil stamping transfers a decorative layer. Embossing reshapes the substrate.
| Comparison | Embossing | Foil Stamping |
|---|---|---|
| Main effect | Raised or recessed depth | Metallic, colored or holographic detail |
| Material added | None for blind embossing | Thin foil layer |
| Tactile effect | Stronger physical relief | Usually flat or lightly impressed |
| Color | Uses paper or printed color | Determined by foil |
| Tooling | Embossing dies | Foil-stamping die |
| Best for | Tactile logos and sculpted patterns | Reflective logos, names and borders |
| Combined use | Can be registered with foil | Can be combined with embossing |
Use foil stamping when reflection and metallic color are the main objectives. Use embossing when tactile depth is more important. Combine them when both are required.
Which Packaging Materials Can Be Embossed?
Embossing quality depends heavily on material flexibility, fiber structure, thickness and surface treatment.
Uncoated paper
Uncoated paper often produces excellent blind embossing because its fibers can form naturally and the paper texture emphasizes light and shadow.
Coated paper
Coated paper can produce sharp registered embossing, but excessive depth may crack the coating. The actual printed and coated sheet should be tested.
Kraft paper
Kraft paper works well for natural blind embossing and debossing. Surface variation may affect very fine detail, but the tactile result can support sustainable or handcrafted brand positioning.
Textured paper
Embossing can enhance textured paper, but deep existing textures may compete with small embossed details. Larger, simpler artwork is generally safer.
Metallic paper
Embossing can change how metallic paper reflects light, creating strong visual depth without adding another finish. Excessive pressure may crack or whiten some metallic surfaces.
Laminated paper
Embossing may be applied to gloss, matte, soft-touch and specialty laminated paper, but the film must tolerate stretching and pressure.
Deep embossing may cause:
Film cracking
Whitening
Delamination
Gloss variation
Distortion around the relief
Physical testing is especially important for anti-scratch and soft-touch films.
Corrugated board
Fine decorative embossing is more difficult on corrugated board because the fluted structure can compress unevenly. Larger structural relief or selected microflute materials may be possible after testing.
Rigid box wrapping paper
For rigid boxes, the wrapping paper is commonly embossed before being mounted onto greyboard.
The supplier must allow for:
Wrapping direction
Corner folds
Glue application
Alignment on the finished box
Relief flattening during mounting
The position of hidden board edges
What Affects Embossing Depth?
Deeper embossing is not always better. The maximum practical depth depends on:
Paper thickness
Paper fiber length
Board stiffness
Surface coating
Lamination
Artwork size
Width of raised elements
Spacing between elements
Die clearance
Pressure
Reverse-side requirements
Proximity to folds and cuts
A broad logo can usually tolerate more depth than tiny lettering. Narrow lines and sharp corners concentrate stress and are more likely to tear or crack.
The desired depth should be selected based on both appearance and material performance.
Artwork Guidelines for Packaging Embossing
Embossing artwork should be created as a separate vector layer.
Recommended artwork preparation
Create a clearly named layer such as “EMBOSS.”
Use vector paths rather than low-resolution images.
Convert important text to outlines.
Separate embossing from printing, foil and UV layers.
Indicate whether the effect is raised or recessed.
Identify single-level, multi-level or sculpted requirements.
Mark cut lines, creases and glue areas.
Indicate registration with printed or foil elements.
Provide a shaded or three-dimensional reference for sculpted relief.
Ask the supplier to review the file before producing tooling.
Avoid extremely fine elements
Very thin lines, small counters and narrow gaps may not form clearly.
Possible problems include:
Lines disappearing
Small gaps closing
Paper tearing
Relief appearing soft
Corners becoming rounded
Printed outlines revealing misregistration
There is no universal minimum line thickness. The practical limit depends on the die, counterdie, paper, depth and machine.
Simplifying small details before sampling often produces a cleaner and more recognizable embossed logo.
Embossing Near Folds and Edges
Embossed areas should generally be kept away from:
Fold lines
Creases
Cut edges
Perforations
Glue flaps
Window openings
Small corner panels
Frequently flexed areas
Deep embossing can weaken the paper or interfere with accurate folding.
If embossing must approach a crease, the packaging supplier should review:
Embossing direction
Grain direction
Carton board thickness
Creasing rule
Folding sequence
Required clearance
Whether the relief will flatten during assembly
Does Embossing Affect the Reverse Side?
Yes. Traditional embossing physically moves the material, so an impression may be visible on the opposite side.
This matters when:
The inside of the carton remains visible
Text or graphics are printed on the reverse
The embossed area touches the product
An insert must sit flat against the panel
Adhesive is applied behind the embossed area
The box requires a smooth interior surface
For rigid boxes, the reverse side of embossed wrapping paper may be hidden after it is mounted onto greyboard.
Raised UV may be a better alternative when the front needs tactile height but the reverse side must remain flat.
What Determines Embossing Cost?
Embossing cost includes tooling, machine setup and production expenses.
| Cost Factor | How It Affects Price |
|---|---|
| Embossing dies | Custom male and female tools are required |
| Die size | Larger tools require more material and pressure |
| Embossing area | Large designs increase tooling and production demands |
| Number of levels | Multi-level dies cost more than single-level dies |
| Sculpted detail | Curved three-dimensional relief requires specialized engraving |
| Registration | Alignment with printing or foil increases setup time |
| Substrate | Difficult paper or film may require testing and adjustments |
| Embossing depth | Deep relief requires more pressure and production control |
| Foil combination | Foil embossing adds foil material and stamping setup |
| Number of positions | Several embossing areas may require larger or additional tools |
| Order quantity | Tooling cost is distributed across more units |
| Sampling | Production-quality samples require tooling and machine setup |
| Production waste | Tight tolerances require additional sheet allowance |
Main setup cost
The main setup cost is the custom embossing die and counterdie.
Main variable cost
The main variable costs include press time, production speed, setup adjustments, quality inspection and additional sheet allowance.
A small embossed logo may still carry a meaningful minimum cost because custom tooling is required even when the embossed area is limited.
Recommended Embossing Type by Objective
| Your Objective | Recommended Option |
|---|---|
| Subtle premium logo without added color | Blind embossing |
| Raised effect aligned with a printed logo | Registered embossing |
| Simple logo at one consistent height | Single-level embossing |
| Several distinct relief heights | Multi-level embossing |
| Rounded and realistic three-dimensional detail | Sculpted embossing |
| Fine repeating texture | Microembossing |
| Metallic logo with tactile depth | Foil embossing |
| Minimalist recessed logo | Debossing |
| Glossy raised logo with a flat reverse side | Raised UV |
| Accessible pharmaceutical information | Standards-compliant Braille embossing |
Common Embossing Problems
Insufficient depth
The embossed design appears weak or difficult to see.
Possible causes include insufficient pressure, shallow dies, stiff material, an unsuitable counterdie or artwork that is too small.
Paper cracking
The paper or coating splits around raised edges.
Possible causes include excessive depth, sharp die transitions, brittle coating, heavy ink coverage, lamination or incorrect material selection.
Paper tearing
The material breaks during embossing.
Possible causes include excessive pressure, narrow elements, sharp corners or insufficient die clearance.
Soft or undefined edges
The embossed design lacks definition.
Possible causes include worn tooling, soft counterdie material, unsuitable paper or insufficient pressure.
Misregistration
The embossing does not align with printed or foil artwork.
Possible causes include sheet movement, printing tolerance, incorrect reference marks or unstable feeding.
Halo around the design
An unintended depressed or marked area appears around the embossing.
Possible causes include excessive pressure, incorrect die clearance or unsuitable counterdie preparation.
Sheet warping
Large embossed areas cause the sheet to curve or distort.
Possible causes include uneven stress, excessive area, deep relief or thin material.
Relief flattening during assembly
The embossing loses depth when the wrapping paper is mounted or the carton is folded.
Possible causes include assembly pressure, glue application, stacking or packing.
How Durable Is Embossing?
Embossing does not normally scratch away because the effect is formed in the paper itself. However, the relief can flatten or become damaged through:
-
Tight stacking
-
Heavy packing pressure
-
Repeated rubbing
-
Folding
-
Automated assembly
-
Compression during shipping
-
Moisture
-
Incorrect storage
Deep reliefs and sharp edges may be more vulnerable than broad, gently rounded embossing.
Finished production samples should be packed and transported under realistic conditions before final approval when the tactile effect is critical.
Is Embossed Packaging Recyclable?
Blind embossing reshapes paper or paperboard without necessarily adding another material layer. It therefore does not automatically prevent paper recycling.
However, recyclability depends on the complete packaging structure, including:
-
Paperboard
-
Lamination
-
Foil
-
Ink
-
Coatings
-
Adhesives
-
Plastic windows
-
Inserts
-
Local recycling infrastructure
Do not claim that a package is recyclable solely because it uses embossing. Evaluate the complete finished structure.
Embossing may be a useful design option when tactile branding is required without applying a full-surface plastic film or metallic layer, but the environmental result must still be assessed as a whole.
Can Embossing Be Used on Food Packaging?
Embossing can be used on many food, chocolate and confectionery packages, particularly on exterior panels.
The supplier should consider:
-
Whether the embossed area has direct food contact
-
Whether the relief weakens the packaging barrier
-
Reverse-side contact with the product
-
Hygiene requirements
-
Coatings and inks used with the embossing
-
Local food-packaging regulations
-
Product pressure against the embossed panel
-
Whether the relief interferes with sealing
Decorative embossing should not be assumed to be suitable for direct food-contact surfaces without reviewing the complete material specification.
A Note About Braille Embossing
Braille embossing is functional rather than merely decorative.
The dot height, diameter, spacing, position and readability may be governed by applicable standards and regulations. Ordinary decorative embossing artwork should not be presented as compliant Braille.
For pharmaceutical or regulated packaging:
-
Use applicable Braille standards.
-
Confirm language and character accuracy.
-
Use suitable carton board.
-
Validate dot height and spacing.
-
Inspect production consistency.
-
Keep other decoration from interfering with readability.
Heidelberg offers dedicated folding-carton Braille systems designed to control embossing tools and maintain consistent Braille quality at production speed.
Sampling and Approval Process
A digital rendering can show where embossing will appear, but it cannot accurately reproduce:
-
Actual depth
-
Edge definition
-
Shadow
-
Paper stretch
-
Reverse-side impression
-
Surface cracking
-
Tactile feel
-
Interaction with foil or lamination
For important projects, use the following approval sequence:
-
Review the embossing artwork.
-
Confirm paper and lamination.
-
Select single-level, multi-level or sculpted tooling.
-
Produce the embossing dies.
-
Make a physical sample using the intended material.
-
Check registration, depth and reverse-side appearance.
-
Test folding, gluing and assembly.
-
Test packing and transportation if the relief is critical.
-
Approve the finished physical sample before mass production.
How to Specify Embossing in a Packaging Quotation
Provide:
-
Packaging structure
-
Finished dimensions
-
Paper or paperboard
-
Printing method and colors
-
Lamination or surface coating
-
Embossing artwork
-
Raised or recessed direction
-
Single-level, multi-level or sculpted requirement
-
Desired depth
-
Registration with printing or foil
-
Total embossing area
-
Number of embossed positions
-
Order quantity
-
Target market
-
Sample requirements
-
Delivery schedule
Instead of writing only “embossed logo,” use a more complete specification:
Single-level registered embossing on the printed logo over anti-scratch matte lamination, with the relief kept clear of fold and glue areas.
For complex work, provide a physical reference or three-dimensional rendering showing the intended height and contour.
Frequently Asked Questions
What is embossing in packaging?
Embossing uses matched dies and pressure to raise selected areas of paper or paperboard. It creates visible and tactile depth for logos, lettering, illustrations and decorative patterns.
What is blind embossing?
Blind embossing creates a raised design without adding ink, foil or contrasting color. The effect is produced by paper texture, light and shadow.
What is registered embossing?
Registered embossing aligns the raised relief with printed artwork, foil or another decorative element.
What is the difference between embossing and debossing?
Embossing raises the design above the surface. Debossing presses the design below the surface.
Does embossing require custom dies?
Yes. Conventional embossing normally requires a custom male die and corresponding female counterdie.
Is embossing the same as raised UV?
No. Embossing reshapes paper or board, while raised UV deposits a thick coating on top of the surface.
Can embossing be combined with foil stamping?
Yes. Foil and embossing can be produced together with a combination die or in separate registered operations.
Can laminated packaging be embossed?
Yes, but the film must tolerate pressure and stretching. Deep embossing can cause cracking, whitening or delamination, so physical testing is recommended.
Can kraft paper be embossed?
Yes. Kraft paper can produce an attractive natural blind embossing effect, although surface texture may reduce very fine detail.
Can corrugated board be embossed?
Selected corrugated materials can be embossed, but the flute structure may compress unevenly. Fine decorative detail is generally more difficult than on solid paperboard.
Does embossing affect the reverse side?
Usually yes. Because embossing physically reshapes the material, a corresponding impression may be visible on the reverse side.
Can embossing crack at folds?
Yes. Deep embossing near a crease can weaken the material or interfere with folding. Keep critical relief away from fold lines whenever possible.
Is deeper embossing always better?
No. Excessive depth can tear paper, crack coating, distort sheets or reduce fine detail. The best depth depends on the material and artwork.
Is embossing scratch-resistant?
The formed relief does not scratch away like a surface coating, but it can flatten, crack or become damaged through compression, rubbing or folding.
Does embossing increase packaging cost?
Yes. Cost is affected by die size, number of levels, sculpted detail, embossing area, registration, substrate, sampling and order quantity.
Is embossed packaging recyclable?
It may be recyclable because blind embossing does not necessarily add another material. However, recyclability depends on the complete packaging structure and local recycling system.