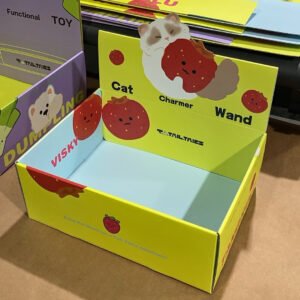
Packaging finishes are treatments applied to printed packaging to protect the surface, change its appearance, add tactile qualities, or highlight selected design elements.
Some finishes cover the entire printed surface, such as matte or gloss lamination. Others are applied selectively: spot UV can create gloss contrast, foil stamping can add metallic details, and embossing or debossing can create physical depth.
The right finish should not be chosen only because it looks premium. It should support the packaging material, artwork, product positioning, handling requirements, and production budget.
It is also important to distinguish printing, finishing, and specialty processing. Printing creates the graphics; finishing enhances the printed surface; specialty processes can change the structure, material, texture, or optical behavior in ways that extend beyond conventional finishing.
Quick Answer: Packaging finishes are post-printing treatments used primarily to protect or enhance the visual and tactile characteristics of packaging. Common finishes include lamination, varnishing, UV coating, foil stamping, embossing, and debossing. Lamination and varnish can protect or modify larger surface areas, while foil, spot UV, embossing, and debossing are often used selectively to emphasize logos, patterns, or other design elements.
Packaging Finishes at a Glance
| Finish | Main Purpose | Visual / Tactile Effect | Typical Application |
|---|---|---|---|
| Lamination | Protection + surface modification | Matte, gloss, soft-touch or specialty film surface | Folding cartons, rigid boxes, paper bags |
| Varnishing | Surface protection + gloss control | Gloss, matte or selective contrast | Cartons, labels, printed paper |
| UV Coating | Protection / decorative enhancement | High gloss, spot gloss or raised effect | Logos, patterns, premium cartons |
| Foil Stamping | Decorative metallic effect | Gold, silver, colored or holographic metallic detail | Logos, text, borders, patterns |
| Embossing | Dimensional enhancement | Raised surface | Logos, typography, patterns |
| Debossing | Dimensional enhancement | Recessed surface | Logos, typography, premium minimalist designs |
Printing vs Finishing vs Specialty Processing
These terms are often used together in packaging production, but they do not mean the same thing.
| Category | What It Does | Examples |
|---|---|---|
| Printing | Creates graphics, colors, text and images | Offset, Digital, Flexographic, Screen |
| Finishing | Protects or enhances the printed surface | Lamination, Varnishing, UV Coating, Foil Stamping, Embossing, Debossing |
| Specialty Processing | Creates structural, fiber-based, laser, optical or interactive effects beyond conventional finishing | Die Cutting, Flocking, Laser Engraving, Holographic Effects, 3D Lenticular |
For example, a luxury folding carton might use:
Offset Printing → Matte Lamination → Gold Foil Stamping → Embossing → Die Cutting
Each step performs a different function.
If you are deciding how the graphics should be printed, see our Packaging Printing Methods guide.
For structural, fiber-based, laser, holographic and interactive techniques, explore our Specialty Packaging Processes guide.
Protective & Surface Finishes
These finishes primarily protect the printed surface or modify its overall gloss, feel, and appearance.
Lamination
Packaging lamination bonds a thin film to the printed surface.
It can change both the appearance and physical characteristics of packaging.
Common options include:
- matte lamination,
- gloss lamination,
- soft-touch lamination,
- scratch-resistant films,
- and selected specialty films.
Matte Lamination
Matte film reduces surface glare and creates a more subdued appearance.
It is widely used for:
- luxury rigid boxes,
- cosmetic packaging,
- electronics packaging,
- fashion packaging,
- and premium paper bags.
It also creates an effective base for contrasting decorative effects such as gloss spot UV or foil stamping.
Gloss Lamination
Gloss lamination increases surface shine and can make printed colors appear more vivid.
It is often selected when:
- high visual brightness is desirable,
- photography should appear more saturated,
- or additional surface protection is required.
Soft-Touch Lamination
Soft-touch lamination creates a smooth, velvety or silky tactile sensation.
It should not be confused with flocking.
Soft-touch lamination uses a continuous film surface, while flocking creates its tactile character using actual short fibers applied to adhesive.
Depending on the film and packaging construction, lamination can improve resistance to:
- scuffing,
- moisture,
- fingerprints,
- handling,
- and surface abrasion.
However, lamination adds another material layer to the package. Where recyclability or material simplification is important, the complete packaging construction should be evaluated rather than considering the finish in isolation.
Lamination vs Varnishing
Lamination and varnishing can both protect printed packaging, but they use different materials and create different surface characteristics.
| Factor | Lamination | Varnishing |
|---|---|---|
| Material Added | Film | Thin liquid coating |
| Protection | Generally stronger | Light to moderate depending on coating |
| Surface Character | Strongly defined by film | Generally more subtle |
| Matte / Gloss Options | Yes | Yes |
| Soft-T Options | Available | 499.00 per kg |
| Material Complexity | Adds a film layer | Typically thinner coating layer |
| Typical Use | Premium surface + stronger protection | Surface protection and gloss control |
Neither is universally better. The choice depends on the packaging structure, appearance, required surface performance, material strategy, and budget.
Varnishing
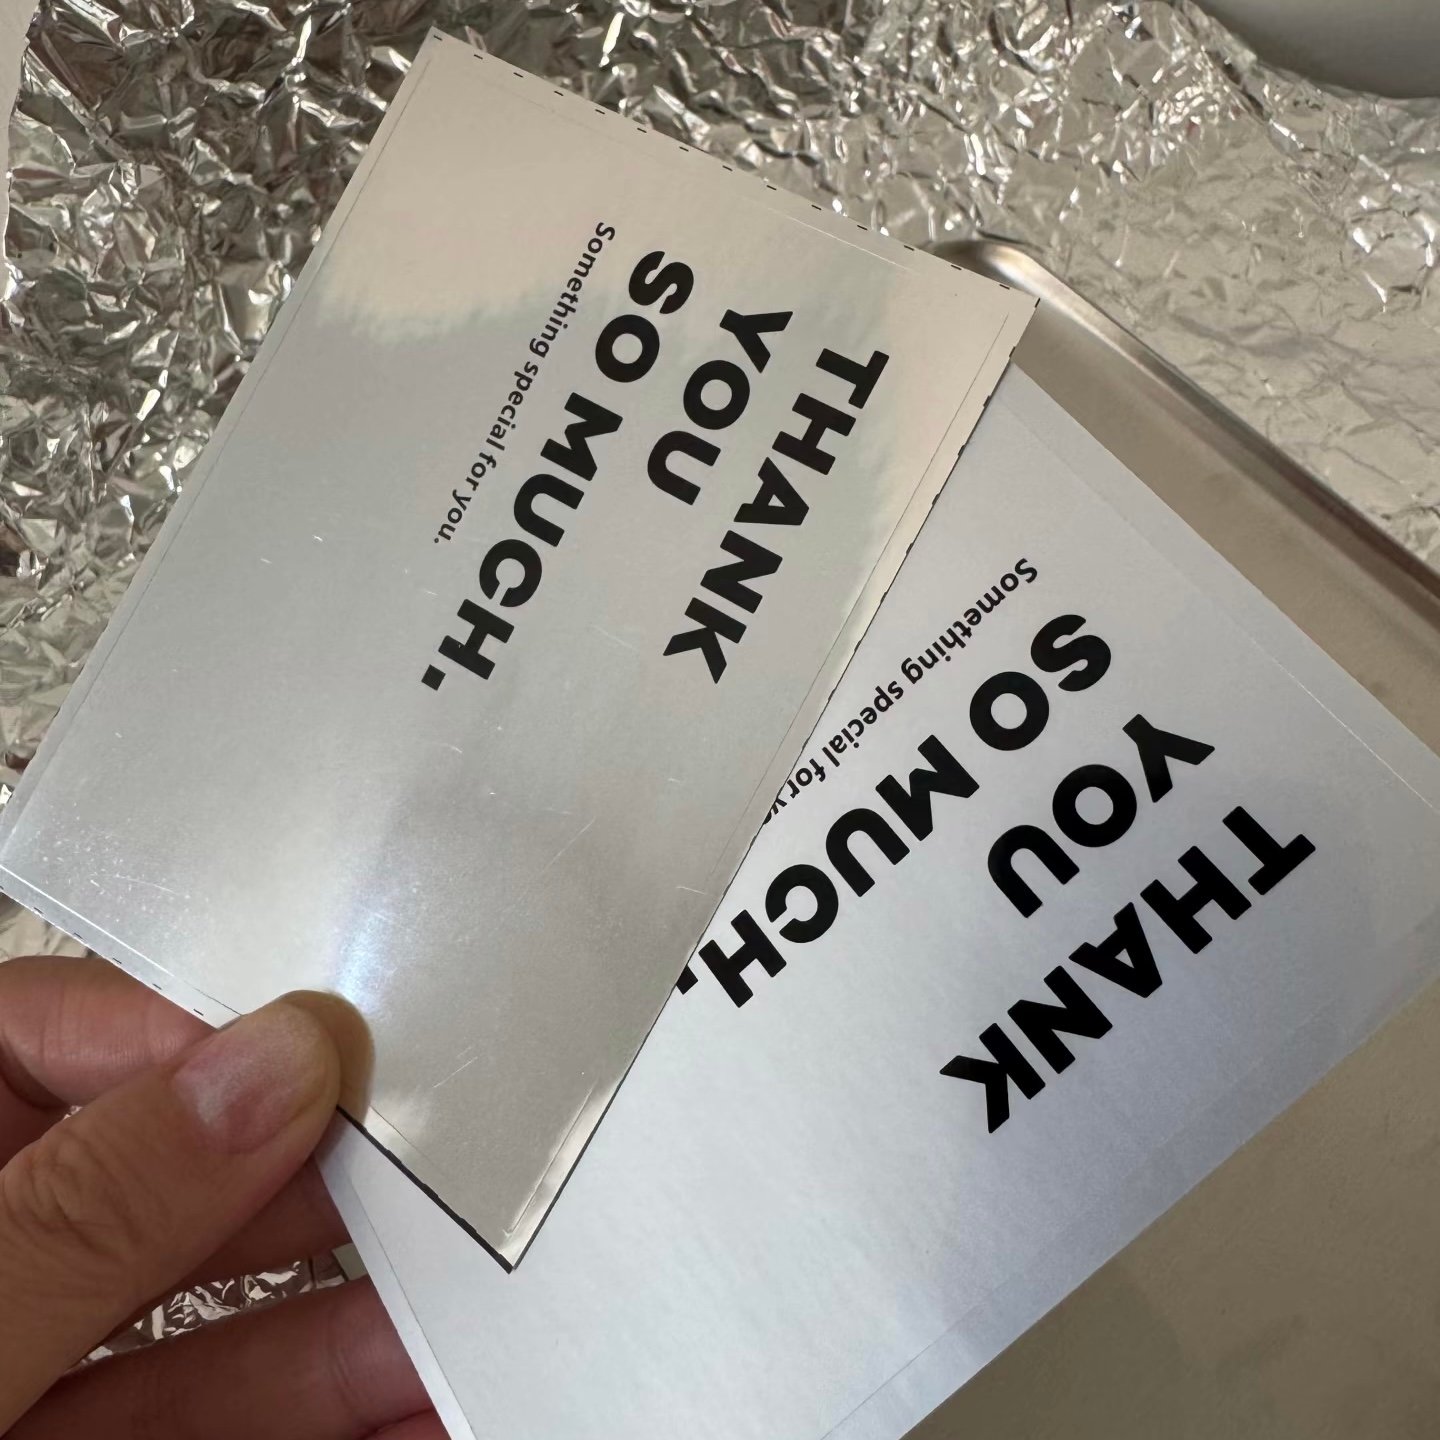
Packaging varnishing applies a clear coating over printed areas.
Compared with film lamination, varnish generally adds a much thinner coating layer.
Depending on the formulation and application method, it can provide:
- surface protection,
- gloss control,
- matte appearance,
- selective contrast,
- or other functional surface characteristics.
Gloss Varnish
Gloss varnish adds shine and can enhance printed color appearance.
Matte Varnish
Matte varnish reduces glare and creates a more subdued surface.
Spot Varnish
Spot varnish applies coating only to selected areas rather than the entire printed surface.
Water-Based / Aqueous Coating
Water-based coatings are widely used for broad surface protection on suitable printed packaging.
Compared with lamination, varnish is usually thinner and tends to preserve more of the natural character of the underlying paper.
UV Coating
UV coating is a liquid coating cured rapidly using ultraviolet energy.
It can be applied broadly or selectively, depending on the required effect.
Full UV Coating
Full UV coating creates a glossy surface across most or all of the printed area.
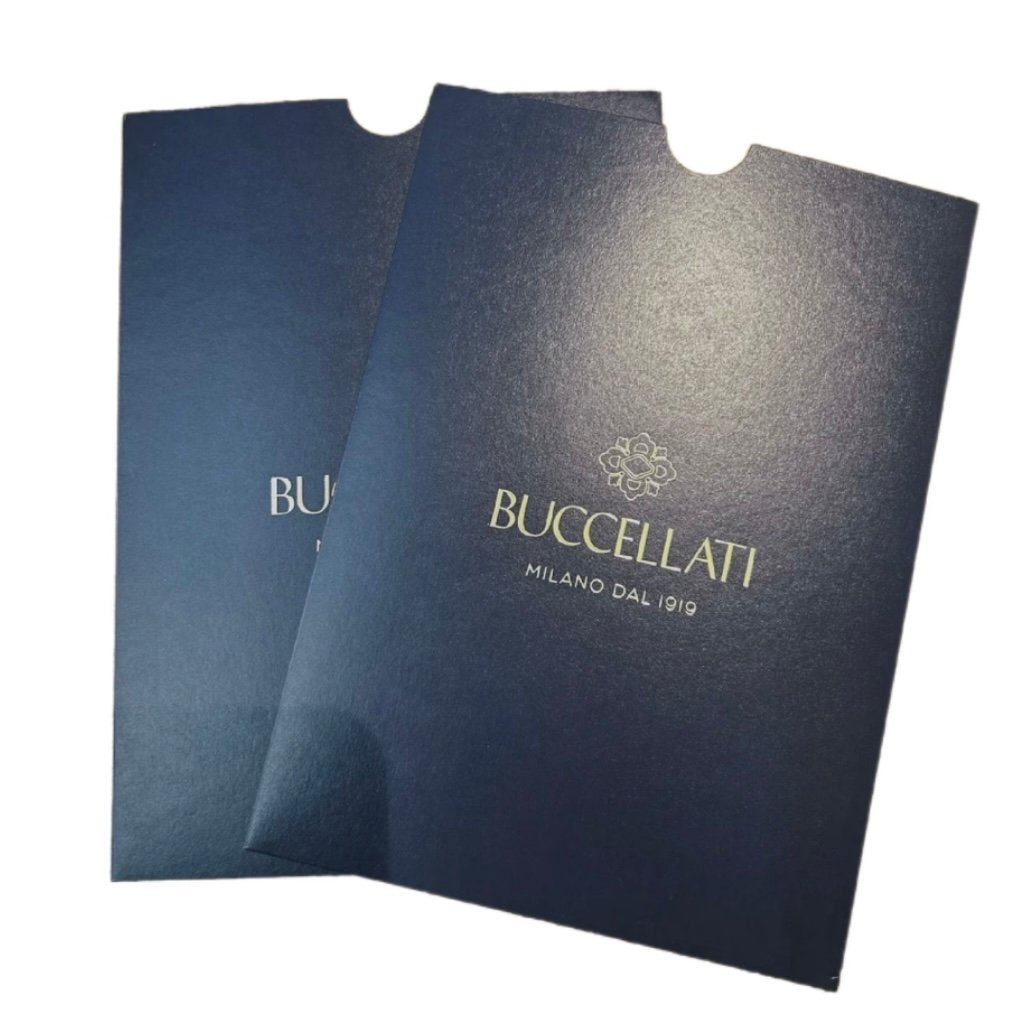
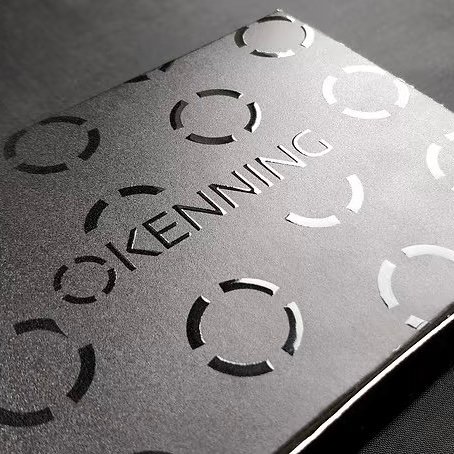
Spot UV
Spot UV applies gloss to selected elements such as:
- logos,
- typography,
- patterns,
- photographs,
- or graphic details.
One of the most common premium combinations is:
Matte Surface + Gloss Spot UV
The contrast between low-gloss and high-gloss areas can make a design stand out through reflected light even when the printed colors are similar.
Raised UV
Raised UV uses a greater coating build to create a more noticeable dimensional and tactile effect.
It is often used for:
- logos,
- lettering,
- patterns,
- line art,
- and selected decorative graphics.
UV Coating vs UV Printing
These terms should not be confused.
UV printing is a printing technology in which ink is cured using ultraviolet light.
UV coating is a coating applied over a printed surface.
Our Screen Printing guide provides a broader comparison of screen printing, UV printing, and UV coating.
Decorative Metallic Finishes
These finishes are primarily used to create localized metallic or reflective decoration rather than protect the entire package.
Foil Stamping
Foil stamping transfers decorative foil onto selected areas of packaging.
Gold and silver are the most familiar options, but foils are available in many appearances, including:
- gold,
- silver,
- rose gold,
- copper,
- colored metallic,
- pigment foils,
- and holographic patterns.
Foil stamping is particularly effective for:
- logos,
- brand names,
- borders,
- typography,
- fine patterns,
- and selected decorative accents.
Foil Stamping vs Metallic Ink
Metallic ink creates its appearance using metallic-effect pigments within the ink.
Foil uses a transferred decorative layer with a different reflective structure.
Highly reflective foil can therefore produce a stronger mirror-like metallic appearance than conventional metallic ink.
This does not mean foil is always the correct choice.
If a design requires large metallic backgrounds or graphics that interact with a metallic surface, Metallic Paper Printing may be more appropriate.
Foil Stamping vs Metallic Paper
| Factor | Foil Stamping | Metallic Paper |
|---|---|---|
| Metallic Effect Source | Transferred foil | Metallic substrate |
| Best For | Localized details | Large integrated metallic areas |
| Logo / Typography | Excellent | Possible |
| Large Metallic Background | Possible but may be less practical | Strong application |
| Colored Graphics over Metallic Effect | Limited by foil construction | CMYK can interact with metallic substrate |
| Tooling | Foil die normally required | Depends on printing process |
| Typical Visual Role | Metallic accent | Base material / integrated design element |
The two processes can also be combined.
For example:
Silver Metallic Paper + CMYK + Selective White + Gold Foil Logo
creates two distinctly different metallic effects on one package.

Holographic Foil and Holographic Effects
Holographic foil can be applied through foil-stamping processes, so it has a strong technical relationship with conventional packaging finishes.
However, holographic packaging extends beyond foil stamping.
Holographic effects can also involve:
- holographic films,
- holographic substrates,
- transferred optical structures,
- and other specialty materials.
For this reason, we classify Holographic Effects primarily within our Specialty Packaging Processes knowledge cluster while maintaining its close relationship with foil stamping and lamination.
A useful starting distinction is:
Localized holographic logo or pattern → consider holographic foil
Large holographic surface → consider holographic film or substrate
The final choice depends on the artwork, material, quantity, and production construction.
Tactile & Dimensional Finishes
These processes create physical depth or tactile changes rather than relying only on printed color or gloss.
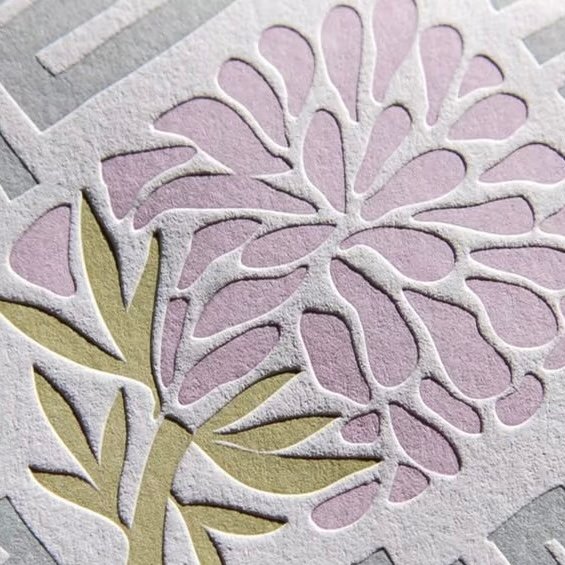
Embossing
Embossing reshapes the material to create a raised design.
Common embossed elements include:
- logos,
- lettering,
- borders,
- patterns,
- icons,
- and decorative textures.
Because embossing creates physical relief, the appearance changes as light moves across the raised surface.
This makes it particularly effective for minimalist packaging where the design relies on material, shadow, texture, and subtle dimensional detail.
Blind Embossing
Blind embossing creates the raised shape without adding ink or foil.
This can produce a restrained premium effect on unprinted or minimally printed packaging.
Registered Embossing
Registered embossing aligns the raised area with a printed or foil-stamped graphic.
For example:
Gold Foil + Registered Embossing
combines metallic reflection with physical height.
Accurate registration becomes particularly important when multiple effects must align.

Debossing
Debossing presses a design into the material to create a recessed impression.
Like embossing, it can be used for:
- logos,
- typography,
- patterns,
- and decorative graphics.
Embossing vs Debossing
| Factor | Embossing | Debossing |
|---|---|---|
| Direction | Raised | Recessed |
| Visual Effect | Light catches raised areas | Shadow forms within recessed areas |
| Tactile Effect | Raised | Indented |
| Blind Application | Yes | Yes |
| Can Combine with Foil | Yes | Yes, depending on design/process |
| Common Use | Logos, decorative patterns | Logos, minimalist branding |
Neither is inherently more premium. The better option depends on the substrate, artwork, packaging structure, and intended visual character.
What About Flocking?
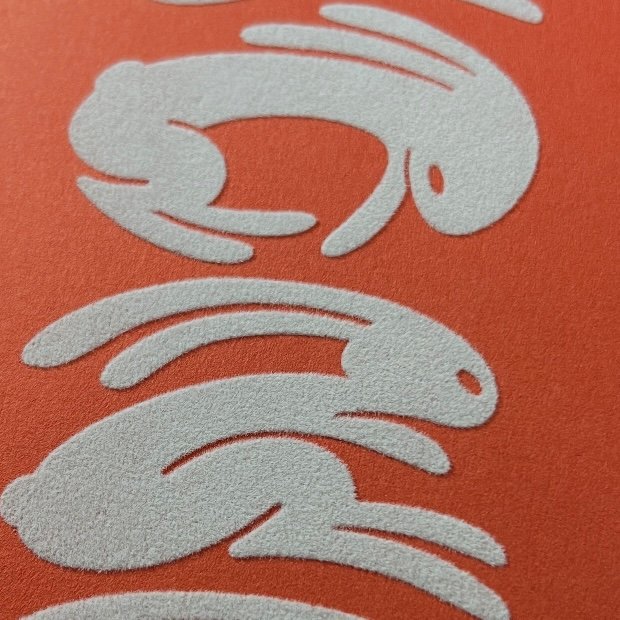
Flocking is sometimes described as a specialty packaging finish because it changes the tactile surface of a package.
However, its production mechanism is substantially different from conventional coatings and films.
Flocking applies actual short fibers to an adhesive-coated surface, creating a velvet-like or textile-like texture.
This distinguishes it from:
- soft-touch lamination,
- soft-touch coatings,
- embossing,
- and conventional varnishing.
For this reason, we classify flocking primarily within our Specialty Packaging Processes cluster.
Flocking vs Soft-Touch Lamination
| Factor | Flocking | Soft-Touch Lamination |
|---|---|---|
| Surface Construction | Fibers + adhesive | Film |
| Feel | Velvet / suede-like | Smooth / silky |
| Visible Texture | Pronounced | Subtle |
| Surface Depth | Greater | Minimal |
| Typical Role | Specialty tactile effect | Premium overall surface finish |
They are not substitutes in every project; they create distinctly different tactile experiences.
Where Do Laser Engraving and 3D Lenticular Printing Fit?
These techniques are sometimes grouped broadly with packaging finishes, but technically they serve different functions.
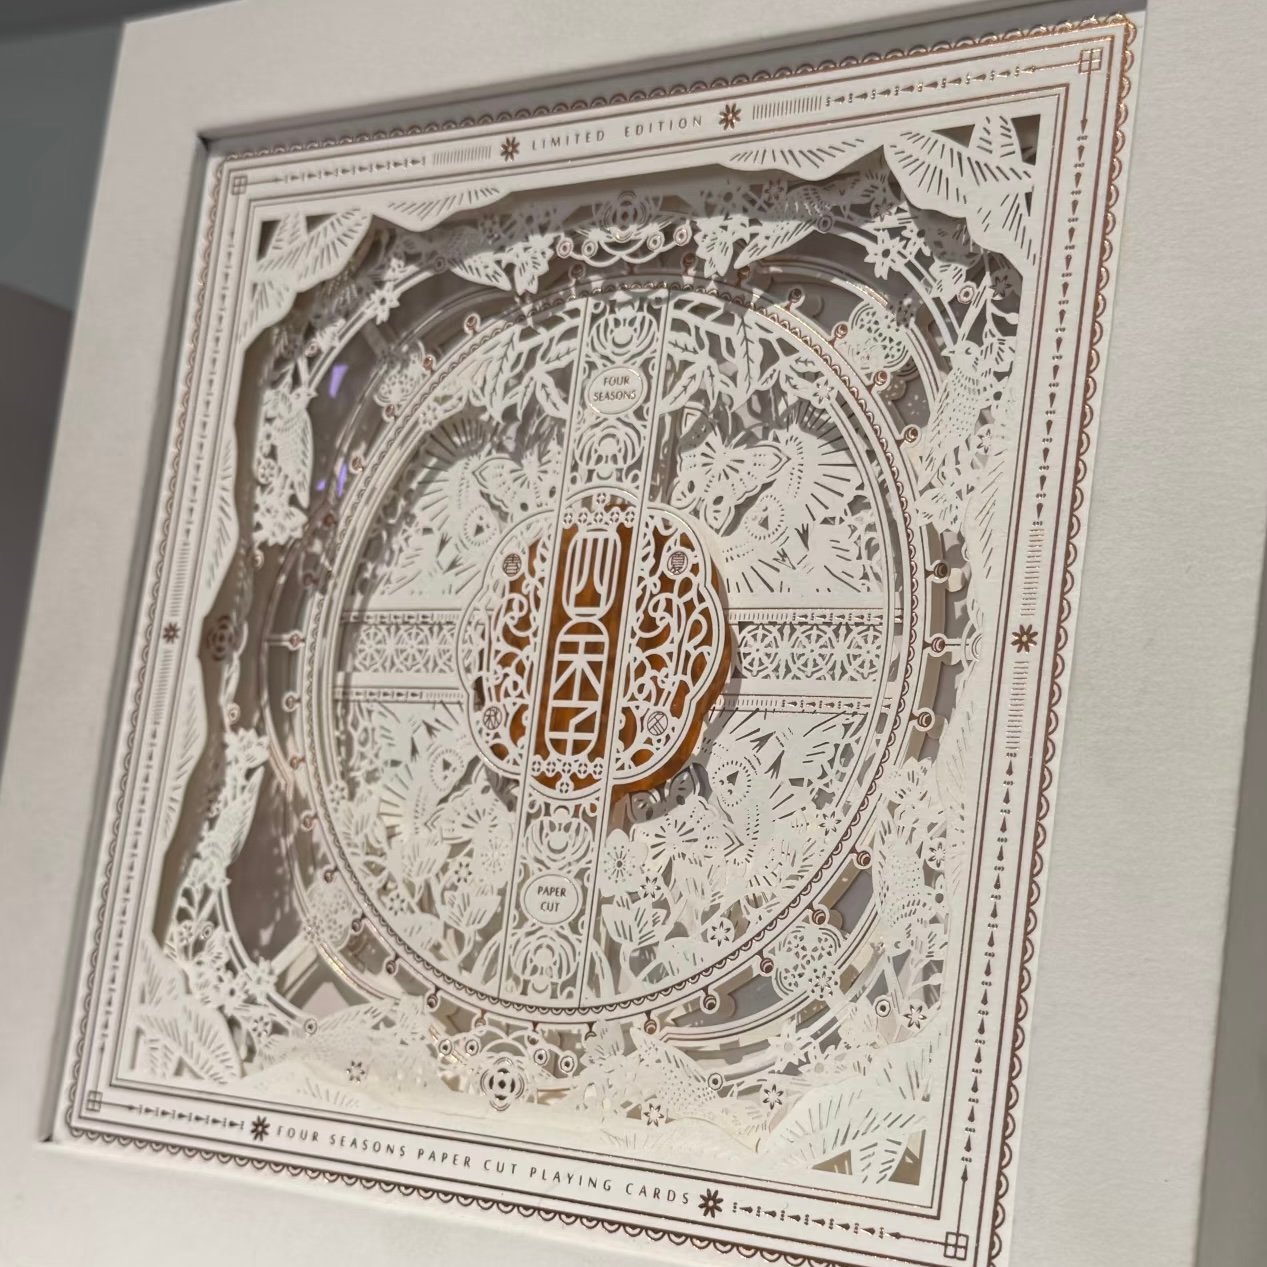
Laser Engraving removes or modifies the material surface using laser energy rather than applying a coating or decorative layer.
3D Lenticular Printing uses a lens structure and specially prepared imagery to create effects such as:
- depth,
- flip,
- motion,
- morph,
- and zoom.
They therefore belong more naturally to Specialty Packaging Processes rather than conventional packaging finishes.
A simple way to distinguish the three knowledge areas is:
How should my artwork be printed?
→ Packaging Printing Methods
How should the printed surface be protected or enhanced?
→ Packaging Finishes
Do I need a structural, fiber-based, laser, holographic, or interactive effect?
→ Specialty Packaging Processes
How to Choose a Packaging Finish
Start with the effect or performance requirement rather than the process name.
| If You Want... | Consider... |
|---|---|
| Matte Overall Surface | Matte Lamination or Matte Varnish |
| Glossy Overall Surface | Gloss Lamination, Gloss Varnish or Full UV |
| Stronger Surface Protection | Lamination |
| Lightweight Surface Coating | Varnishing |
| Smooth Soft-Touch Surface | Soft-Touch Lamination / suitable coating |
| High-Gloss Logo on Matte Background | Spot UV |
| Raised Glossy Logo or Pattern | Raised UV |
| Mirror-Like Metallic Logo | Foil Stamping |
| Large Metallic Background | Metallic Paper |
| Raised Paper Surface | Embossing |
| Recessed Logo | Debossing |
| Velvet-Like Fiber Texture | Flocking |
| Rainbow / Diffraction Effect | Holographic Effects |
| Permanent Engraved Surface | Laser Engraving |
| Image Changing with Viewing Angle | 3D Lenticular Printing |
The final four examples extend beyond conventional packaging finishes. They are included here so buyers can identify when the required result belongs to a specialty process instead.
Combining Packaging Finishes
Packaging finishes are frequently combined because different processes can perform different visual or functional roles.
Matte Lamination + Spot UV
The matte surface creates the overall appearance while spot UV introduces localized gloss contrast.
Matte Lamination + Foil Stamping
A low-reflection background can make metallic foil more visually prominent.
Foil Stamping + Embossing
Foil provides metallic reflection while embossing adds physical relief.
Printing + Embossing
A printed graphic can be aligned with dimensional embossing.
Metallic Paper + Selective White + Foil
The metallic substrate becomes part of the artwork while foil creates an additional metallic focal point.
The objective should not be to use as many premium finishes as possible.
Instead ask:
What role does each finish play in the visual hierarchy of the package?
Too many competing effects can make a design feel less refined rather than more premium.
Finish Compatibility and Production Sequence
Packaging finishes cannot always be applied in an arbitrary order.
A simplified workflow might be:
Printing → Coating / Lamination → Decorative Finishing → Die Cutting → Folding / Gluing
The actual sequence depends on the packaging construction and processes involved.
For example:
- certain coatings can affect foil adhesion;
- embossing may need to align precisely with printed or foiled graphics;
- gluing areas may need to remain free of particular films or coatings;
- folds and creases need to tolerate the selected surface treatment;
- some finishes require testing on the actual substrate.
Finishing should therefore be considered before artwork and structural files are finalized, rather than added as an afterthought after printing has already been planned.
How Packaging Material Affects Finish Selection
Different substrates respond differently to finishing processes.
| Material | Important Considerations |
|---|---|
| Coated Paperboard | Generally compatible with a broad range of finishes |
| Uncoated Paper | Absorbency and texture influence coating appearance |
| Kraft Paper | Natural color affects contrast; roughness can influence fine effects |
| Metallic Paper | Existing reflectivity changes the appearance of coatings and foil |
| Corrugated Board | Surface construction and flute can limit certain direct finishing methods |
| Rigid Box Wrap | Often suitable for premium finish combinations |
| Specialty Textured Paper | Texture can affect foil transfer, coating uniformity and fine detail |
The same finish can therefore look different on different papers.
Physical sampling becomes particularly useful when the substrate has:
- strong texture,
- unusual color,
- metallic reflection,
- high absorbency,
- or an unconventional surface treatment.
What Determines the Cost of Packaging Finishes?
| Cost Factor | Why It Matters |
|---|---|
| Finish Type | Each process has a different production method |
| Quantity | Setup and tooling costs are distributed across the production run |
| Coverage Area | Larger finished areas may require more material and processing |
| Number of Positions | Multiple foil, UV or embossed areas can increase complexity |
| Number of Foil Colors | Different foil colors may require separate setups |
| Tooling | Foil, embossing and debossing commonly require custom dies |
| Registration | Precise alignment with printing requires greater control |
| Material | Some surfaces require additional testing or treatment |
| Packaging Size | Influences material consumption and machine layout |
| Combined Processes | Multiple finishes add production stages |
| Sampling | Custom proofs may require production-specific setup |
This is why asking only:
“How much is gold foil?”
is usually insufficient.
A manufacturer will normally need the:
- artwork,
- foil coverage,
- quantity,
- substrate,
- packaging dimensions,
- and other finishing requirements.
Common Packaging Finishing Problems and How to Avoid Them
| Problem | Possible Cause | Practical Approach |
|---|---|---|
| Foil Does Not Transfer Cleanly | Surface / pressure / temperature / tooling mismatch | Test actual substrate and finish combination |
| Fine Foil Details Fill In | Artwork too fine for the process | Adjust minimum line and gap dimensions |
| Spot UV Misalignment | Registration tolerance | Build suitable artwork tolerance and approve sample |
| Lamination Bubbles or Poor Adhesion | Surface / ink / material incompatibility | Confirm curing and film compatibility |
| Embossing Damages Artwork | Excessive depth or unsuitable structure | Match embossing depth to material |
| Fold Line Cracks After Finishing | Material / film / crease combination unsuitable | Test the converted package, not only the flat sheet |
| Finish Looks Different from Screen | Physical reflection and texture cannot be accurately simulated | Approve physical samples |
| Too Many Effects Compete Visually | No clear visual hierarchy | Reduce processes and assign each a specific purpose |
Artwork Preparation for Packaging Finishes
Special finishes should generally be separated from normal CMYK artwork.
A simplified production file might contain:
CMYK Artwork
Spot Color Layer
Foil Layer
Spot UV Layer
Emboss / Deboss Layer
Dieline
Each special-process layer should be:
- clearly named,
- vector-based where appropriate,
- positioned accurately,
- and separated from unrelated artwork.
Do not represent foil or spot UV only with visual gradients in the CMYK artwork if the effect will be physically produced.
The production file needs to tell the manufacturer where the actual finishing process occurs.
Why Physical Samples Matter for Packaging Finishes
Digital mockups are useful for checking layout, but they cannot accurately reproduce:
- foil reflectivity,
- matte/gloss contrast,
- embossing depth,
- debossing shadow,
- soft-touch feel,
- flock texture,
- holographic diffraction,
- or how these effects change under different lighting.
For finish-critical packaging, evaluate the actual substrate + printing + finishing combination whenever practical.
This is particularly important when:
- exact brand appearance matters;
- several finishes need precise registration;
- unusual materials are used;
- fold areas are involved;
- or the design depends on subtle tactile or reflective contrast.
How to Specify Packaging Finishes When Requesting a Quote
| Information | Example |
|---|---|
| Packaging Type | Rigid gift box |
| Finished Size | 220 × 160 × 70 mm |
| Quantity | 3,000 pcs |
| Material | 1200 gsm greyboard + printed paper wrap |
| Printing | CMYK offset |
| Base Finish | Matte lamination |
| Foil | Gold foil logo |
| Embossing | Registered embossing on logo |
| Spot UV | None |
| Finish Location | Exterior lid |
| Artwork | AI/PDF with separate foil and emboss layers |
| Destination | Country + postal code |
Instead of writing:
“Luxury finish required”
describe the intended construction.
For example:
“CMYK offset printing + matte lamination + gold foil logo with registered embossing.”
This allows the manufacturer to evaluate both production feasibility and cost much more accurately.
Frequently Asked Questions About Packaging Finishes
What is the best finish for luxury packaging?
There is no single best luxury finish. Matte or soft-touch surfaces can create a restrained premium appearance, foil can provide metallic emphasis, and embossing or debossing can add physical depth. The best combination depends on the brand, material, artwork, and intended visual hierarchy.
What is the difference between lamination and varnish?
Lamination bonds a film to the printed surface, while varnish applies a much thinner liquid coating. Lamination generally provides stronger surface protection, while varnishing can provide lighter protection and gloss control with less added material.
Is spot UV the same as UV printing?
No. Spot UV is a coating applied selectively to create gloss or dimensional contrast. UV printing is a printing technology in which ink is cured using ultraviolet energy.
Is soft-touch lamination the same as flocking?
No. Soft-touch lamination uses a smooth film with a soft tactile surface. Flocking applies actual short fibers and creates a more pronounced velvet-like texture.
What is the difference between foil stamping and metallic ink?
Foil stamping transfers a decorative foil layer to the packaging, while metallic ink uses metallic-effect pigments within the ink. Highly reflective foil can create a stronger mirror-like appearance than conventional metallic ink.
Should I use metallic paper or foil stamping?
If a large portion of the package needs to be metallic, Metallic Paper Printing may be worth considering. If only a logo, border, or selected detail requires a strong metallic effect, foil stamping is often more appropriate.
Can foil stamping and embossing be combined?
Yes. A foil-stamped logo can be aligned with embossing to create both metallic reflection and physical relief. Accurate registration and suitable artwork are important.
Can you apply spot UV over matte lamination?
Yes, this is a common premium combination when compatible materials and processes are used. The contrast between the matte background and glossy UV area can make logos or patterns stand out without adding another printed color.
Which packaging finish is most resistant to scratches?
Scratch resistance depends on the exact film or coating formulation. Suitable protective laminates can provide strong abrasion resistance, while specialized scratch-resistant films may be selected when surface durability is particularly important.
Are packaging finishes recyclable?
It depends on the complete packaging construction rather than simply the name of the finish. Material type, film or coating composition, adhesives, coverage, local recycling infrastructure, and applicable packaging requirements all need to be considered.
Choosing the Right Finish for Your Packaging
The best packaging finish is not necessarily the most visually dramatic one.
Start by defining what the finish needs to accomplish:
Surface protection
→ Lamination or Varnishing
Gloss contrast
→ Spot UV
Metallic accent
→ Foil Stamping
Raised dimension
→ Embossing
Recessed dimension
→ Debossing
Then consider whether the desired effect actually belongs outside conventional finishing:
Velvet-like fiber surface
→ Flocking
Engraved material surface
→ Laser Engraving
Rainbow or diffraction effect
→ Holographic Effects
Interactive changing image
→ 3D Lenticular Printing
This distinction helps prevent a common packaging-development mistake: selecting a process because of its name rather than because it produces the required result.
For choosing how your graphics should be reproduced, see our Packaging Printing Methods guide.
For die cutting, flocking, laser engraving, holographic effects, and interactive optical techniques, see our Specialty Packaging Processes guide.
Vigor Packaging can evaluate the printing method, substrate, finishing process, and packaging structure together before production.
Contact us with your dimensions, quantity, artwork, and desired finish to discuss your packaging project.